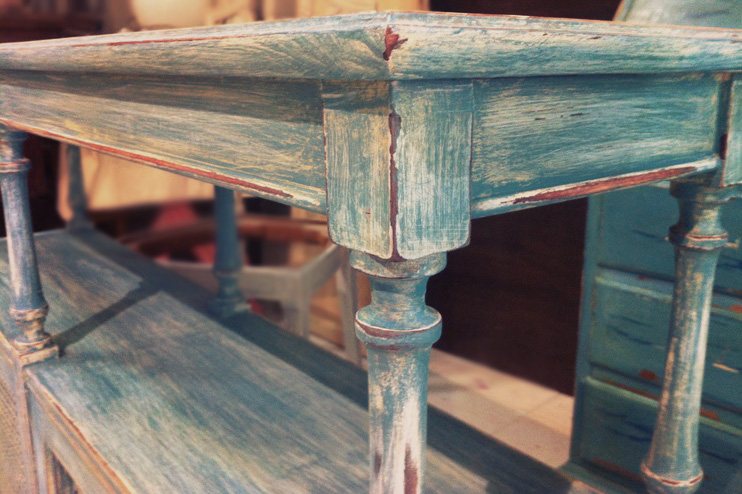
Making your furniture look older than it really is has become a trend in recent times. In addition, it is something very simple to do and no special tools are needed, so it is even a recommended task to enjoy it with our children.

So, if you like decoration and want to give your furniture a rustic or vintage touch, in this post we will show you how it can be done, step by step you will learn how to turn your prefabricated furniture into an antique.
The correct sanding
First, we have to sand the surface of the furniture that we are going to age. We must do it very carefully and gently to get the wall to be rough, using a fine-grained sandpaper. If our furniture is not prefabricated, then we will only have to follow the direction of the wood grain.
Once sanded we have to remove all the dust and shavings that have remained with the help of a damp cloth.
Primer to prepare the surface
Well, we have our furniture ready to apply the first coat of paint, in this case it is primer paint, which will serve as the base for the next layers. Once it is dry, we can start adding a few coats of color.
The most advisable thing is to use a brown base that simulates the color of an old wood. So that there is no gap left to cover, we are going to give it a couple of layers, always leaving time for them to be completely dry.
Waxing the surface
Once we have our furniture primed and with two coats of paint, it is time to give it a special touch. For this we are going to take a candle and rub it on the surface, especially in those places that stand out the most and that we want to age conscientiously, such as the edges, the decoration or the legs.
With this simple step we are going to make our furniture look worn by use or the passage of time. We must remove the excess wax with the help of a brush, being careful not to remove the main layer as well.
Painted with an aged touch
After applying the wax, we will give a pair of coats with white, glossy or matte paint, depending on how you like it more. This is the most basic color, but you can use the one that best suits your personality and that of your home: blue, green, purple choose the one that best suits you. As always, we let it dry before taking the last steps.
Last sanding
With the help of a fine sandpaper, we are going to give a final look to our furniture in order to eliminate the paint in the areas where there is wax, so that we can see the color of the base. Be very careful, because if you screw up its appearance you will have to start over.
Varnished
The last step with which we will conclude the aging process of our furniture is varnishing. We can make our own homemade mixture from one part of base paint and four of water, which we must apply with the help of a brush so that its surface looks even older.


