

When the winter season is approaching and you have not yet decided which garment to warm your hands with, we have an interesting suggestion for you: knit some nice mittens or short gloves with the entertaining crochet and crochet technique.
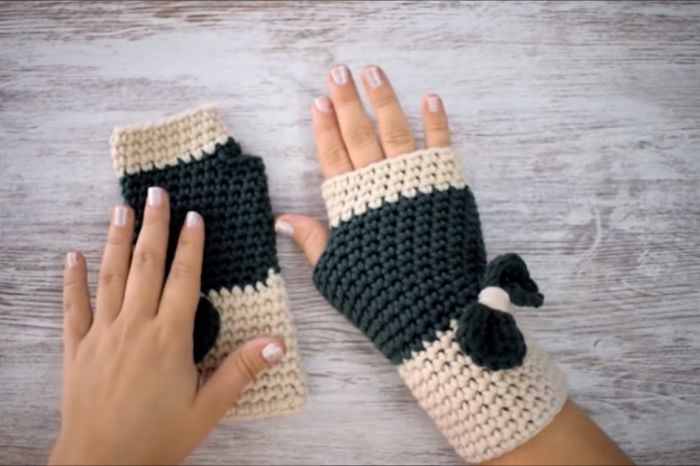
Surely now you will think that that sounds like something complicated. Let us tell you that it is not. With the following tutorial, you will learn step by step how to make crochet gloves step by step and it will be so simple that you will surely want to knit many more for the whole family.
How to crochet mittens or gloves step by step
Materials you will need:
- A 50-gram ball of wool.
- 3-millimeter crochet hook.
Procedure for the manufacture of gloves:
- We make a starting point and we are going to chain 31. In the second chain from the needle, we make a half double crochet, we take yarn, we pass it through the chain, we collect and now we go through the three loops. We are doing this until the end of the chains. They are 30 medium high points.
- At the end, we turn the work so we make a chain to start the row and we continue making half double crochets until the end of the work and we continue following this scheme.
- We make a double crochet, remembering to always make a chain at the beginning every time we turn the work, we continue like this until we do 17 more laps; in this case it is 18 because there are 17 plus the one at the beginning.
- Now we will make an end chain, cut the excess threads and store the threads both the beginning and the end flush with the stitches with a wool needle. We would then have our rectangle well done, now what we have to do is fold it and sew it.
- We measure the length of the rectangle that we have, which is about 15 centimeters, and we will knit leaving four centimeters apart. This would be the top of the mittens.
- We are going to make the last stitches and we are going to close. Remember that this is the reverse part so you have to try to leave it as best as possible, but without so much worry, since this will be inside the mittens.
- Now we cut and we are going to continue doing the bottom part, we are going to also do the top part, we are going to save the thread and now we cut. It is very important before we continue, it is to observe and evaluate how it looks inside, check that nothing is noticed on the back and if it shows a little; well, the important thing is the right.
- After this evaluation we can then put our hand in and in that way, we will measure the bottom of the mitten to see if they fit us. To appreciate that it is a bit loose, you have to knit a few centimeters although it is best if it is a little wide because if it is too narrow, we cannot put our fingers in.
- To mark the reference well, the most advisable thing is to put a needle, a pin, you can also put a dot or an end; whatever you want to remember and thus be able to make the necessary adjustments.
- As you have been weaving, you have to measure to verify that everything is going well. Now we turn it around in case it wants to keep a little point on the outside, or for whatever we get out of place; because it can also happen to us. To verify that, what we have to do is take it out on the other side and verify that everything is adjusted.
- The most important thing to avoid that something escapes us or that it is out of place, is to do everything right from the beginning and to verify each of the parts of the process. That way, even if something goes wrong, it will surely be some small detail that we will surely be able to correct without major setback.
- We have already finished making our mitt. You see that it is very easy to do and that if you are going to take half an hour or an hour, depending on how fast you work and your manual skill. The second that is done exactly the same because it is the same pattern for the 2 mittens.


