This is a quick and easy project to build a self-watering tray to keep plants with the right amount of moisture so they don’t dry out.

It is basically a tray with its own water supply where the pots should be placed and it automatically waters them for you. All you have to do is occasionally fill the main water tank, but that’s it.
They are excellent for seedlings, roots that have been pruned, and anything else that needs constant moisture.
How does the self-watering tray work?
This simple but effective device works on the principle of absorption as explained below. In this configuration, a terracotta pot (with its drainage hole sealed) is used as a water reservoir. Next to it is a potted plant. Both are sitting on the capillary mat that absorbs the water.
- The terracotta pot slowly transfers water onto the terry cloth.
- Plush, a synthetic absorbent material, absorbs water like a sponge.
- The pots absorb the water from the wet terry.
Construction details:
- The first thing you need is a plastic tray with drainage channels in it to keep everything together. What is shown below is a seed tray that is used commercially in nurseries. Any plastic tray with a drain will work.
- The most important piece is the plush. It is a 5mm thick gray synthetic fabric that will not rot in constant humidity. It can probably be found at places that sell greenhouse supplies or hydroponic systems.
- The third necessary component is a small terracotta pot.
- Seal the drainage hole in the terracotta pot with silicone sealant (or any other means) so that it retains water and does not leak.
- Cut the fleece so that it fits snugly at the bottom of the plastic tray.
- When the silicone sealant dries properly, you are ready to set watering. Place the terracotta pot in the center of the tray. This ensures a uniform level of humidity throughout the tray.
It is best to move this installation to its final location at this point, as it may be too heavy or delicate to move, once the water and plants are placed. A covered location in partial shade or dappled sunlight is recommended as you don’t want your delicate plants exposed to full sun or wind. The water won’t last forever.
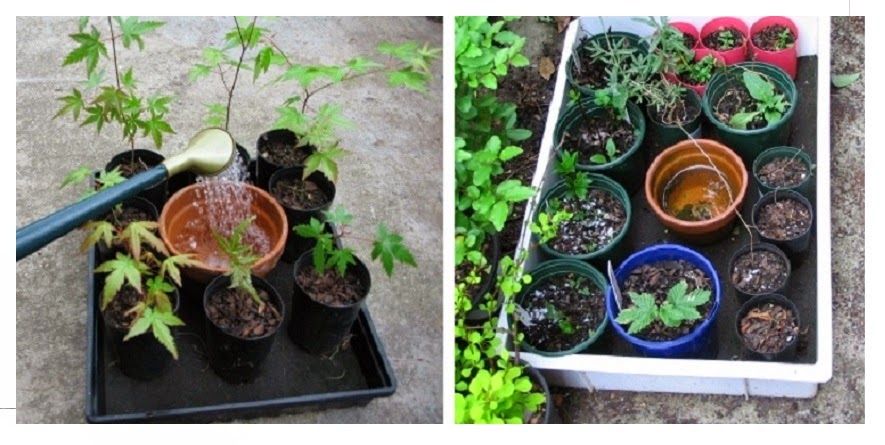
- Place the plants you want around the pot.
- Fill the pot with water.
- Put water on each of the plants, so that the excess water spreads from the bottom of the pots onto the terry to establish the transmission effect on the potting soil.
- All complete, a well-watered collection of plants. Now, just fill the terracotta pot and she will do the rest.
If the pot accidentally dries up, it is refilled with water and also the individual pots to re-establish transmission.
Some useful tips.
This can be scaled in size too without any problem. This is another configuration roughly 1.5 ‘x 2’ in size, which has been in place for a few months. It is located on the east side, near a fence where a bit of morning sun sets and dappled or indirect light around noon.
This is where I put the little seedlings and plants with freshly pruned roots to keep them safe from desiccation, and to establish a little more until ready to plant.
This irrigation system, which is essentially what is called “sub-irrigation” (watering the plants from the bottom up), also allows the seedlings to develop strong root systems, which make them much stronger when planted in the garden afterwards.
Since it absorbs moisture from the bottom, and the roots of the plants grow toward the source of moisture, the seedlings develop a deep, strong and extensive root system. Be careful because they will grow very well, and will put roots in the plush!
You can add a sheet of root control mat over the terry if you want to prevent plants from rooting in it.
Also, if you really want to give the seedlings an extra boost, you can add some nutrients or fertilizers to the water in the pot. Following all organic, I recommend you try things like seaweed extract, liquid ground worm, or compost tea. You will be amazed at the accelerated growth rate due to the constant moisture and nutrient source!


