

Building a Zen fountain in your own home can be an extremely relaxing and beneficial task during the construction of this Zen design, in addition to the fact that you will have a Zen fountain at your disposal and in the backyard of your own home, which will give it a decorative look. to your environment that will make it look extremely attractive.
Benefits of building a Zen fountain in your own garden
If you sweat the stress out in the sauna, let yourself go in a “yoga” position, and the “om” is not exactly being relevant, and you don’t know why you are working so hard to relax, what you need perhaps is a place to sit quietly and contemplate the sounds of nature: birds singing, the breeze that blows, murmurs of streams. Don’t have a stream near your house? It is no problem. Build a Zen fountain yourself in the garden with a soft and relaxing drip.
How to build a Zen fountain?
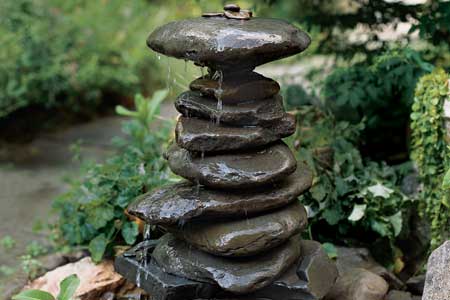
The project is nothing you have to stress over. In a weekend you can revive any ornament that you no longer use in your garden, turning it into an enduring monument to tranquility. Revive a birdbath or drill a pile of rocks found on site, like in this old one I made for a friend on a hot afternoon. When the job is done and the fountain is running, take the stress off your bones with this cascading stream. Relaxing never seemed so easy.
Steps for the construction of the Zen fountain
1. Dig the pump hole
Using a pointed shovel, dig a hole 2 inches wider than the bowl and wide enough to fit. Put the dirt in a wheelbarrow or tarp to protect nearby grass. Dig a narrow, shallow trench between the well and the closest outside exit.
Sets the basin and conduit of the Zen fountain
Put a 2-inch-thick bed of gravel to drain into the pit. Place the bowl on the gravel. Measure the distance from the outlet to the edge of the pit. Cut a section of PVC conduit to this length. Pass a string through the conduit and tape one end to the pump plug. Pull the plug through the conduit. Cap the plug tightly at the end of the conduit so that it does not pull in. Rest the conduit in the trench and backfill over it.
3. Fit the parts
Center the bomb in the bowl. Place the screen (the one that will cover the hole) over the well and mark at the point directly over the threaded outlet on the pump. Also mark the edge closest to the duct.
4. Mark with an opening
With special scissors, cut a 1-inch-wide circle at the center mark. Next, cut a three-sided flap at the conduit mark that is large enough for your hand to reach in and remove the pump for repair.
5. Connect the pipe and the pump
Using a pipe cutter, cut a 4-inch section from the end of the copper tubing. Unscrew the compression fittings on the ends of the ball valve. Slide a ball valve nut, then the brass ring, or ferrule, onto the long section of pipe. Insert the tube into one end of the ball valve, then finger tighten the nut over the ferrule on the valve. Attach the short length of tubing to the other end of the valve in the same way.
Screw the threaded end of the adapter into the pump outlet. Remove the compression end and slide the nut, then the ferrule over the short section of tube. Connect the tubing to the pump with the compression fitting. Using an adjustable wrench, tighten the three compression nuts an extra quarter turn.
Pour a 2-inch layer of drainage gravel into the bottom of the basin where the Zen fountain will rest. Place the pump in the center of the basin with the tube facing up. Slide the screen over the pipe and arrange it so that the access flap is near the conduit.
6. Place the cover under the Zen fountain
Using a hand saw, cut the sections of wood long enough to extend beyond the hole a few inches on each side. Place the wooden cover over the hole at the top of the screen.
7. Do the math
Stack the stones to create an aesthetic arrangement for the construction of the Zen fountain. List at the bottom of each stone with a pencil to keep track in order as you stack them.
Place a stone on the gravel. Using a hammer drill fitted with a 5/8-inch bit, drill through the flat of the stone. Repeat the procedure for all the stones.
Tip: Keep a bucket of water near the bit. Pour some intermittently onto the stone to keep it moist and the bits cool as you work and you can shape the design in your Zen fountain.
8. Assemble the Zen fountain
Run the stones over the copper tube until they are stacked and balanced. Mark the tube where the stones end. Remove the top stone and use a pipe cutter to cut the copper pipe 1/4 inch below the mark. Replace the stone.
Fill the reservoir with a garden hose, adding enough water to rise 5 cm above the pump. Open the ball valve, connect the pump, turn it on and check the flow. Adjust the pressure with the ball valve.
9. Finishing the construction of the Zen fountain
Direct the water by rotating the stacked stones. Wedge smaller stones into the holes to keep the structure stable. To make the arrangements permanent, turn off the water and place clear silicone adhesive between the stones. Let the glue dry before turning the fountain back on. Once the fountain flows the way you would like, close the screen and camouflage the base with small stones.
Tip to keep in mind before building the Zen fountain: Check the water level in the basin regularly, especially in a heat wave, and replenish to constantly keep the pump submerged.


