In this note you will learn with these easy permaculture methods, how to make your own compost in 18 days and have fertile soil to start any garden or orchard project.

How to compost at home?
Regular composting, also known as “cold composting,” involves placing a variety of organic materials in a compost bin, enclosure, or even just a large pile, and leaving it there until it breaks down several months later. It is a very slow process and usually takes 6 to 12 months. It can be sped up by turning the compost, that is, moving the material at the bottom of the pile on top and vice versa, to mix and get more oxygen in there, but it’s still a long wait.
The other approach to composting is “hot compost,” which produces compost in a much shorter time. It has the advantages of killing the seeds of weeds and pathogens (diseases), and breaking the material into very fine compost. In contrast, cold compost does not destroy seeds, but if cold compost weeds, weed seeds will grow when compost is put into the garden.
Cold composting doesn’t destroy pathogens either, so if you put diseased plants in your cold compost, diseases can spread in the garden, hence the common advice, don’t compost in (cold) diseased plants. The other problem with cold composting is that you end up with a lot of large leftover pieces in the compost when the process is complete, while hot compost looks like little black humus (dirt).
One hot composting method, the Berkeley method, developed by the University of California, Berkley, is a fast, efficient, high-temperature composting method that will produce high-quality compost in 18 days.
Requirements for composting.
The requirements for hot composting using the Berkley method are as follows:
- Compost temperature is kept between 55-65 degrees Celsius.
- The balance of C: N (carbon: nitrogen) in composting materials is approximately
25-30: 1. - The compost bin should be approximately 1.5 m high.
- If the compost material is high in carbon, such as tree limbs, they have to be broken up, such
as with a shredder. - The compost is turned from the outside to the inside and vice versa, to mix thoroughly.
With the 18-day Berkley method, the procedure is very simple:
- Build a compost pile.
- 4 days – no turning.
- Then rotate every 2 days for 14 days.
Materials we will need.
Composting Materials and the Carbon-Nitrogen Balance.
In the hot composting method, the ratio of carbon to nitrogen in compost materials has to be between 25 to 30 parts carbon and one part nitrogen by weight.
This is because the bacteria responsible for the composting process require these two elements in these proportions as nutrients to build their bodies while they reproduce and multiply.
High-carbon materials are typically dry, “brown,” such as sawdust, cardboard, dry leaves, straw, twigs, and other woody or fibrous materials that rot very slowly.
Materials that are high in nitrogen are typically wet, “green” materials, such as grass clippings, fruit and vegetable waste, animal manure, and leafy green materials that quickly rot.
If the C: N ratio is just right in this fast, aerobic (uses oxygen), hot composting technique, the compost will break down to the same volume. This is in contrast to the slow, anaerobic (oxygen-free) composting that occurs in a compost bin, which dramatically reduces its volume as it rots down.
Many of the ingredients used for composting do not have the ideal ratio of 25-30: 1. When using hot composting methods, you need to make an assessment of how quickly the materials decompose, and then use a mixture of things that rot quickly and things that rot slowly.
* Composting materials with a very low C: N ratio of 7: 1 rot very quickly due to their high nitrogen content, for example. fish, this decomposes very quickly.
* Composting materials with a very high C: N 500: 1 ratio would take a long time to decompose, because they are low in nitrogen, and need to be broken, for example tree branches.
For example, if the C: N ratio is very high, it can be reduced by adding manure or grass clippings. If the C: N ratio is too low, you can increase it by adding cardboard, dry leaves, sawdust, or wood chips.
In trying to understand what C: N ratios are about, it can be helpful to point out that all plants have more carbon than nitrogen (remember, they get carbon from CO2 carbon dioxide in the air), so that’s why where the C: N ratios are always above 1: 0. Below are the mean C: N ratio of some common organic materials used for composting.
* Materials that contain high amounts of carbon, but low in nitrogen are considered “brown”.
* Materials containing higher amounts of nitrogen are considered “green”.
Here are some C: N ratios for some common composting materials:
Brown = High Carbon C: N
- 400: 1 chip.
- 350: 1 cut carton.
- Sawdust 325: 1.
- Shredded newspaper 175: 1.
- Pine needles 80: 1.
- Corn stalks 75: 1.
- Straw 75: 1.
- Sheets 60: 1.
- Fruit residues 35: 1.
- Peanut shells 35: 1.
- Wood ashes, 25: 1.
Green = High in Nitrogen C: N
- Garden Waste 30: 1.
- Weed 30: 1.
- Green grass 25: 1.
- Hay 25: 1.
- Vegetable Leftovers 25: 1.
- Clover 23:01.
- Ground coffee 20:01.
- Food waste 20:01.
- Grass clippings 20:01.
- Seaweed 19:01.
- Horse manure 18:01.
- Cow dung 16:01.
- Alfalfa 12:01.
- Chicken manure 12:01.
- Pigeon manure 10:01.
- Fish 07:01.
- Urine 01:01.
Everything that was once life can be hot compost – and I really mean EVERYTHING. All sorts of things, including weird additions like wool and cotton clothing, bones, leather boots, even things like dead animals, but these have to go to the very center of the pile to break properly. There is no trace of the original ingredients when the process is complete! Remember, the greater the variety of ingredients, the better the compost will be, as it will have a wider range of nutrients in the final product.
Basically, if you want to get started and want it fast, you will try to use 1/3 manure and 2/3 dry carbon materials. It will work. Simply stack alternating thin layers of greens and browns until you end up with a compost pile that is 1 square meter and a little taller than that. There is no real need to get up to speed on the precision math of C: N ratios. It’s more a matter of testing, although I can’t put into words how easy it all is.
To illustrate this point, a friend with a small yard (in a rental property) wanted to try hot composting, and I helped him with the project. He gathered a wheelie bin (garbage can) full of fallen leaves from the street, a garbage can full of weeds from his garden , he bought a small bale of straw to enrich it further. I helped him collect a few bags of cow dung garbage from an urban farm. It took us less than an hour to accumulate everything to stack in thin layers (less than 5cm) of each ingredient to get a good mix.
It was his first attempt at hot composting, and in about 18 days, he had over 1 cubic meter of rich, dark compost, to use in his garden. You couldn’t distinguish any of the original components in the final product as it had a very fine consistency. Best of all, it cost him next to nothing – the bale of straw was more than a $ 17 luxury, it would have worked just as well without it, and without it would have cost nothing.
Just think that 1 cubic meter is 1,000 liters, and if you knew what you pay for a 30-liter bag of soil mix (over $ 10) here in Australia, you would realize what value this entails.
Hot composting step by step.
Day 1.
- Mix the ingredients, alternating thin layers of “greens” and “browns.”
- Dampen the compost pile very well so that water starts to drip to the bottom and is saturated.
You can put activator in the middle of the compost heap to start the composting process. Triggers include comfrey, nettle, yarrow, animals, fish, urine, or old compost.
Day 4.
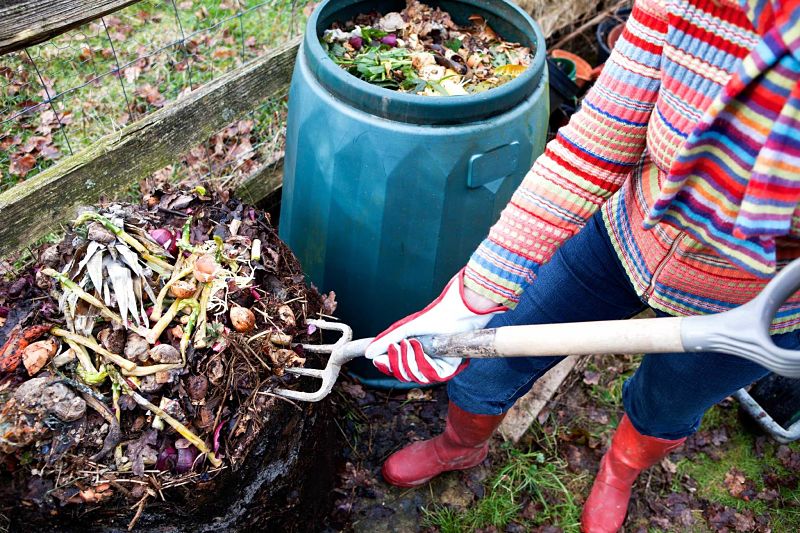
- Flip the finished compost pile, flip the outside in, and vice versa.
- To explain in more detail, when turning the compost, move the outside of the pile to a location close to it, and keep the material moving from the outside to the new pile. When you are done, all the material that was inside will be outside and vice versa.
- Make sure the humidity stays constant. Put on your gloves and squeeze a handful of the composting materials, only a drop of water falls, or a drop almost drips.
If it gets too wet, you can spread it down, or poke a hole about 3-4 ”wide, or put sticks underneath for drainage.
Day 6 and day 8.
The abonera should reach its maximum temperature on these days. As a simple guideline. If you can put your arm in the compost up to the elbow, then it’s not 50 degrees Celsius, and it’s not hot enough. It is best to use a compost thermometer.
You need optimal temperature of 55-65 degrees Celsius. At temperatures above 65 degrees Celsius a white coating spreads through the compost, which is actually “fire blight”, an anaerobic bacterium. The temperature will be fluctuating in 6-8 days and gradually cools down during the 18th day.
Flip the compost pile every second day (on day 6 and again on day 8).
* If the compost pile begins to decrease rapidly in size, there is too much nitrogen in the compost.
* To heat compost faster, toss in a handful of blood and bone fertilizer each time you fork out.
* If it gets very hot and smells bad and low in size, it has too much nitrogen, you should slow down, throw in a handful of sawdust each time you remove with the fork.
* Using this Berkley method, methane is released from the compost.
Day 10 to day 18.
Continue turning the compost every 2 days
| 1.- Remove the outer layers and stack to one side; 2.- Stack the inner layer to the outside. |
Day 18.
It’s warm, dark brown, smells good.
When worms move into compost, you know it’s done and done, because it cools and is packed with nutrients!
Final notes to keep in mind.
Some important points to keep in mind when we are composting:
- Look for your compost pile to be in an area protected from the sun or heavy rain to prevent the compost from drying out or filling with too much moisture and slowing down the composting process.
- The space required for her dynamic storage should be 1.5 x 1.5 meters, and enough space in front of her to stand when turning the compost.
- Put water on each layer until wet as you build the pile. After three or four days, air the compost by turning it over. Turn every three days until the compost is ready, usually in 14-21 days. Remember, frequent turning and aeration is the secret to composting success.
- Twist the compost with a garden fork, or better yet, a long-handled fork.
- In cold or wet weather, you can cover the compost pile with a sheet of tarp or plastic to prevent the rain from cooling it down and allowing water to penetrate the core of the compost pile. Although the cold outside air will cool the surface, it will not do so in the core of the compost pile, covering it, this prevents some heat loss from the surface to the cold outside air, and retains the heat within the compost pile. compost better.
Happy composting!


